
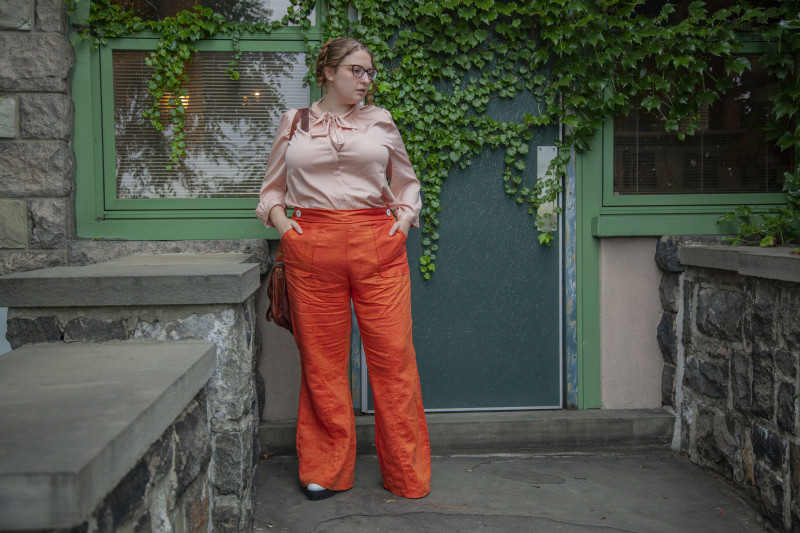
The 70’s are all over the runway this year and you don’t want to miss out on adding some of that flair to your wardrobe. Retro styling and adorable details will make you fall head over heels for The Ash Pants! These flare leg pants are super flattering on a variety of body types and we are confident that they’ll definitely get you noticed in all of the best ways! Wear them with your favorite blouse and heels for a more formal look or pair them with your favorite t-shirt and sneakers for a relaxed feel. No matter how you choose to style them, you will always be happy you have them on hand! Make yours with a linen, like we did, for a great transitional piece or use a denim, cotton, or even wool for colder weather wear.
Fabrics & materials used:
- 2 yards of *Sanremo Red and Gamboge Two-Tone Linen Woven (* Unfortunately at the time of this post this particular fabric color has been discontinued by the vendor and therefore we suggest using Sanremo Orange and Fuchsia Two-Tone Linen Woven as a close alternative)
- 1 spool of 400 Bright Orange 100m Gutermann Sew All Thread
- 2 pcs White and Black Plastic 4-Hole Button – 40L/25mm
- 1 053 Bright Orange 9″ Invisible Zipper
- 1/2 yard of Off-White Weft Fusible Interfacing
- MDF083 – The Ash Pants Sewing Pattern (free download below!)
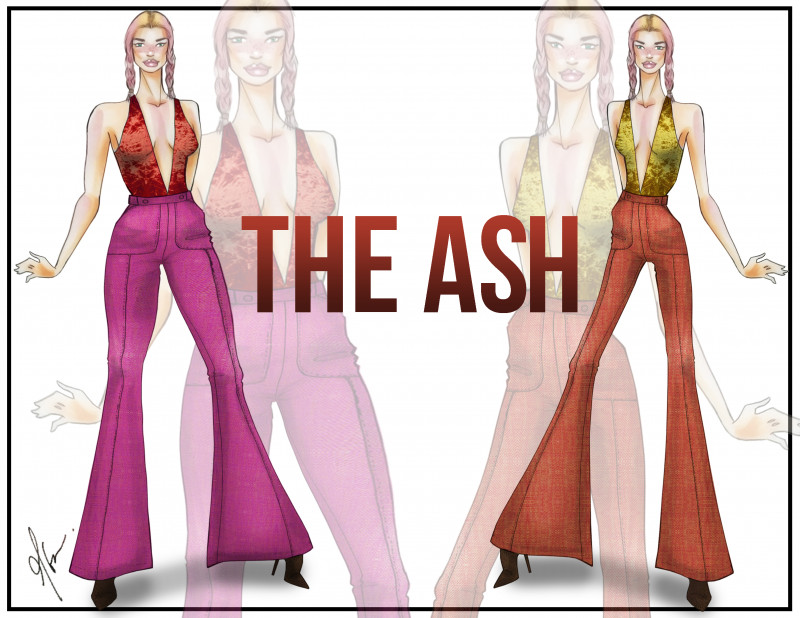
The Ash Pants – Free Pants Sewing Pattern
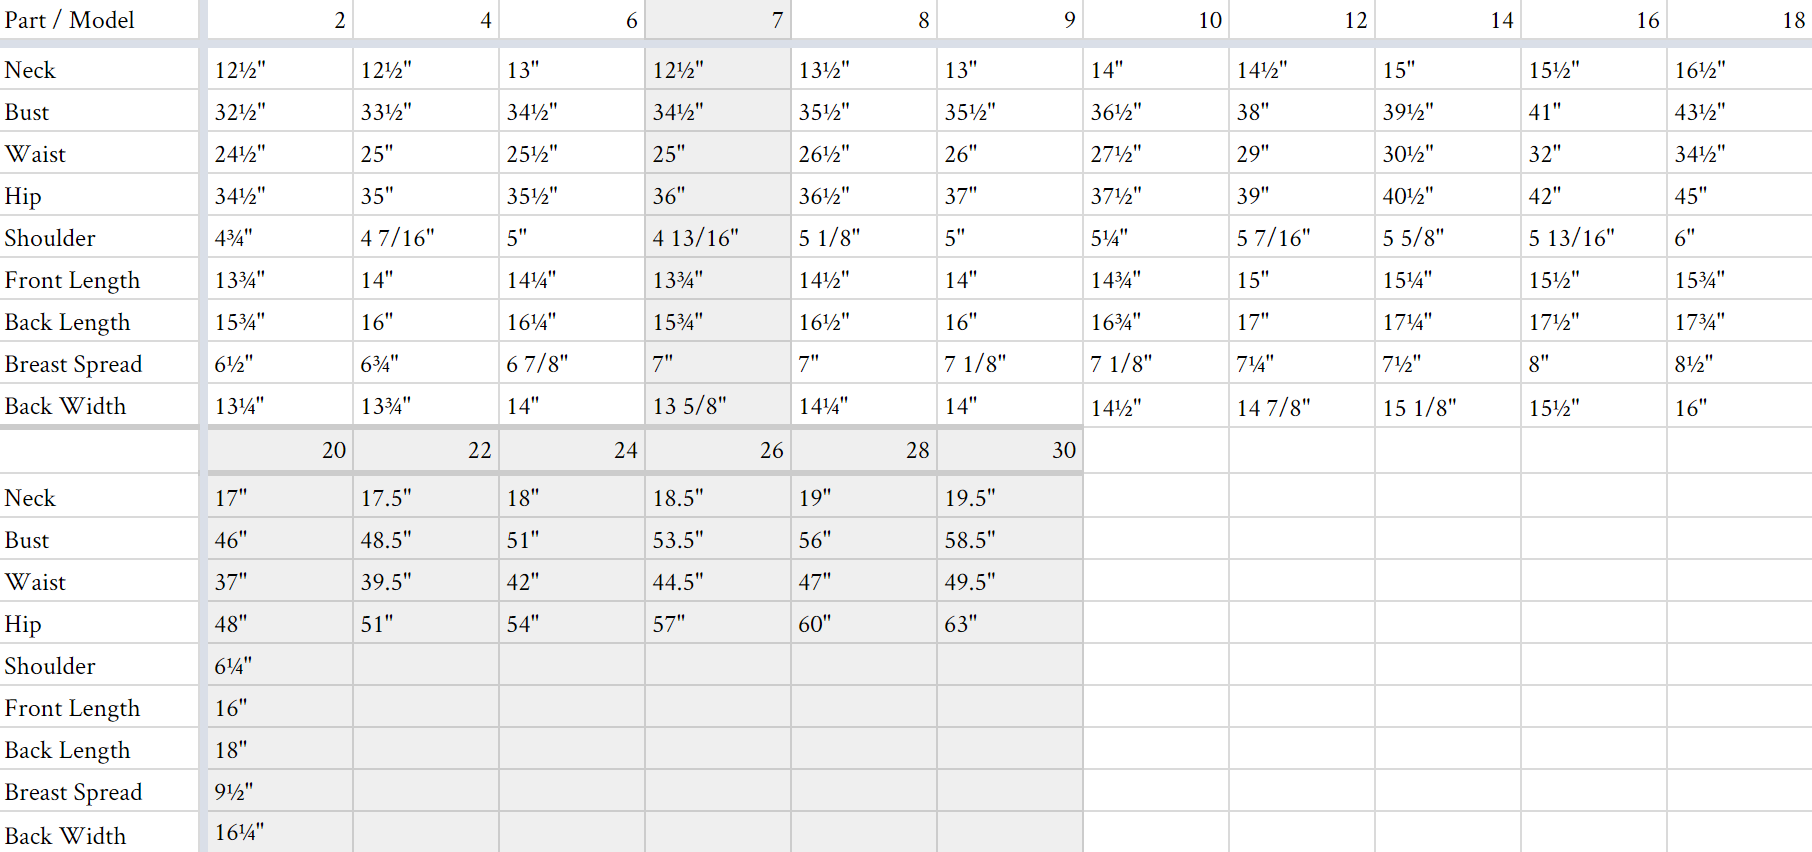
All seam allowances are 1/2″ unless otherwise stated. See chart below for sizing specifications. Note, this specific pattern is available up to a size 30.
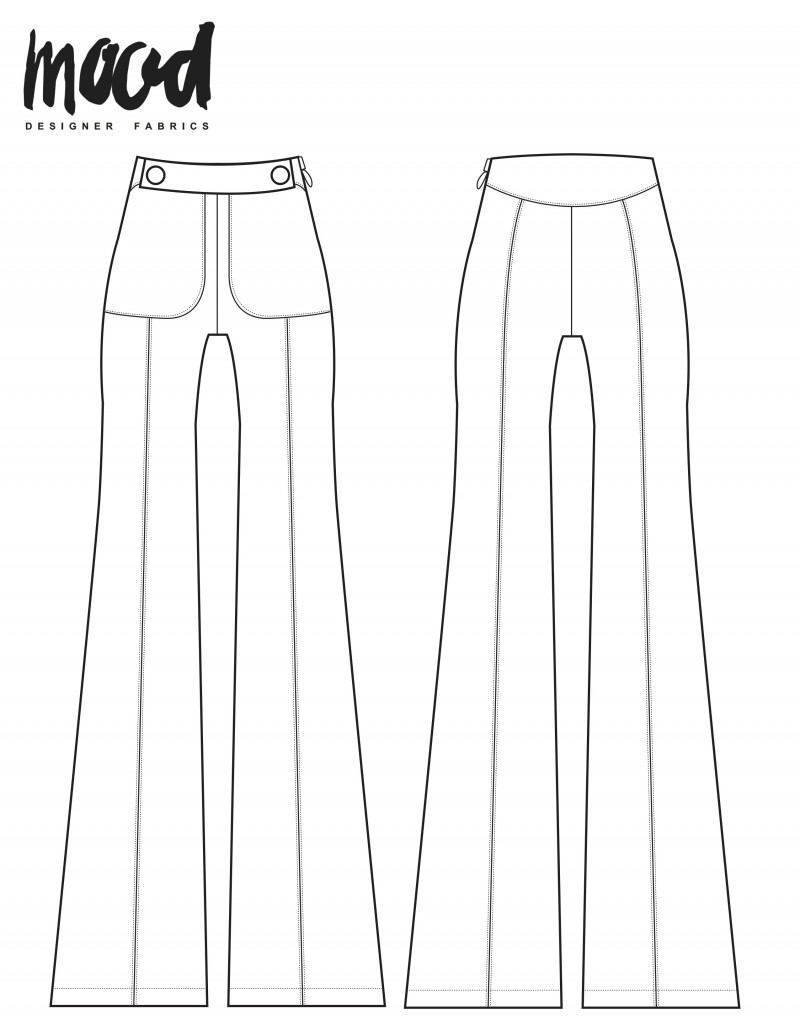
Begin by locating your front pant pieces and connecting them down the princess seam using a french seam. Once the seam has been made go ahead and top stitch on both sides of the seam you just created. Repeat the same steps on the back pant pieces.

Next, sew the two front pant panels together at the center front rise, then attach the patch pocket to the front panels of your pants and top stitch.

Attach the back pant panels at the center back rise just like you did on the front.

Now, sew your front and back pieces together at the inseam and side seams. Be sure to leave an opening on the side where your zipper will be inserted.

Let’s work on the waistband. Begin by adding the interfacing to both the front and back pieces, then sew your waistband pieces together at the side seam.

Attach your waistbands to each other at the top, making sure to clip the seam allowance. Pin one side to the top of your pants, then sew it in place. Flip the waistband right side out then topstitch the waistband closed. Add your invisible zipper on the side that was left open to complete.

Now, the finishing touches! Sew your decorative waist tab all around the edges leaving a gap open on the bottom. Flip the piece right side out through the gap. Press, then topstitch the entire piece closed. Tack this piece to the front of your pants and finish with a button on each end.


Finally, complete your pants with a 1″ rolled hem and presto! You are ready to go out and strut your stuff!


12 comments
Does this pattern include the 1/2” seam allowance or do I need to add it?
A 1/2″ seam allowance is already included! 🙂
Very confused with the sizing on these. I measured twice and cut once but the resulting pants could hold myself and probably most of my family, including the dog. Not sure where I went wrong… I have unpicked and am redrafting very carefully………..
beginner sewer, looking for ideas
Is there a video? I consider myself an advanced beginner but this pattern is not making sense to me. Wondering what the ease is supposed to be, pieces seem huge for my measurements and confused by the waistband.
Hi Charise, we’re sorry for the delay in responding to your question! We get dozens of comments and questions each day, and so many questions get buried and, unfortunately, unanswered. We are now focusing user support on patterns 2 years and newer. We hope this will prevent questions on our more current patterns from going unanswered. Although this is late, we wanted to respond in case anyone else has the same question: we do not offer video sew-a-longs for our free tutorials at this time.
Beautiful colour pics of steps in the process but I cannot see the actual pattern. I have subscribed, received an email but can’t see where to download the pattern. Please help.
Hi Toni, we’re sorry for the delay in responding to your question! We get dozens of comments and questions each day, and so many questions get buried and, unfortunately, unanswered. We are now focusing user support on patterns 2 years and newer. We hope this will prevent questions on our more current patterns from going unanswered. Although this is late, we wanted to respond in case anyone else has the same question: if you’re still having trouble downloading, email info@moodfabrics.com and they’ll send the pattern directly to you!
The waistband fits fine, but the pants are massive. The length of the waist of the pants compared to the length of the waistband is much longer. If there is any darts or gathering you should put it in the instructions. Also, if i was a complete beginner the instructions would probably be a bit confusing.
Thought it looks great and thankyou for your pattern, and thankyou for making it free for everyone <3
Does an A0 size pdf pattern of this exist? I use a professional print house to print my patterns and they need A0
Hello,
Thank you for visiting and downloading from Mood Sewciety!
In order to keep our free sewing patterns free, we are exclusively offering an A4-Letter size version at this time that includes all sizes. We appreciate your request and will keep it in mind for future patterns.
Happy Sewing!
The MoodSewciety Team
I hope that the Ash pants are those related to the Barbie bell bottomed trousers, I guess my concern was raised when I saw the image placed above the name of the pattern which subsequently raised alarm!
I appreciate that the patterns are free but ink is expensive and so too are reams of A4 paper, that said, perhaps it might be useful if a note signalled that attached images may cause confusion
Thank you once again for the provision of free patterns which on the whole are of good quality and serve a purpose of teaching those keen to learn fashion, design and sewing skills